
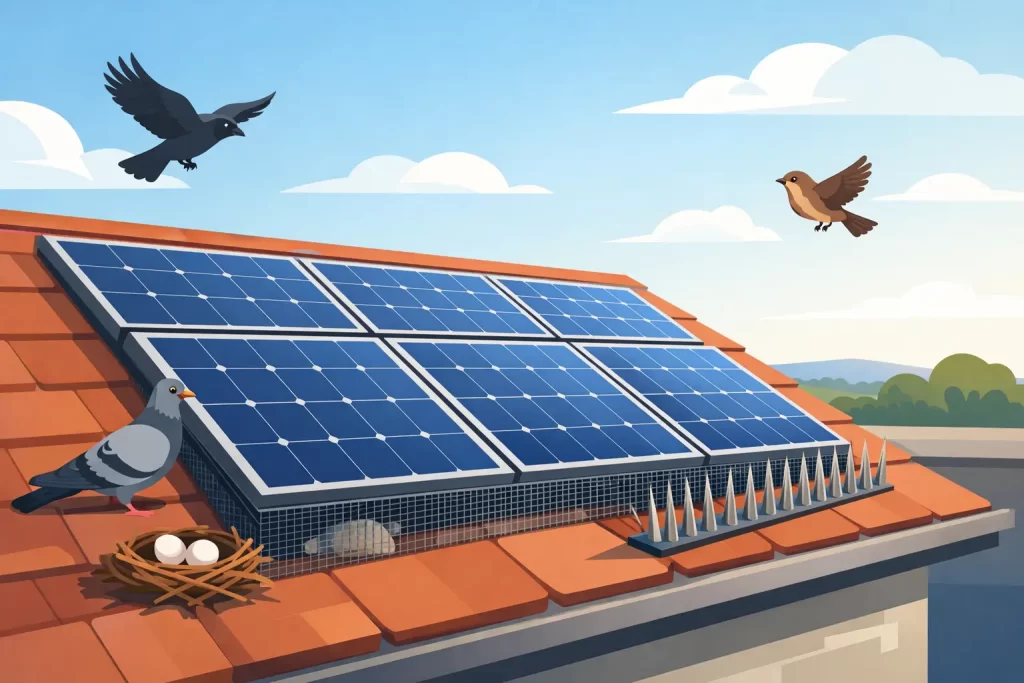
Pigeons do not need much encouragement to move beneath a solar array. The gap under the panels offers warmth, shelter from the weather and a secure place to nest. Once birds are established, the mess is not confined to the roof. Droppings, nesting debris and persistent noise can quickly turn a well-performing solar installation into a hygiene, maintenance and generation problem. Knowing how to add bird proofing properly means protecting the panels, the roof and the investment beneath them, rather than simply blocking a visible gap.
Why bird proofing matters for solar panels
Bird activity below solar panels can cause far more trouble than most homeowners expect. Nesting material builds up around cables and beneath panel edges, while droppings can contaminate the roof covering, gutters and drainage routes. Rain then carries that debris down the roof, often leaving staining and blockages behind.
There is also a performance issue. Birds on and around the array create more soiling on the glass. Even a relatively small amount of shading or heavy contamination can affect output, particularly where panels are wired in strings. If moss, leaves and feathers are also collecting beneath the system, water may not drain away as it should.
The most expensive consequence is often damage caused during poor-quality removal or fitting work. Solar panels are not just roof tiles with wires attached. They are part of a live electrical system mounted on a weatherproof roof structure. A contractor who treats bird proofing as a quick fencing job can scratch panel frames, disturb cables, crack tiles or create a route for water ingress.
Check the roof and nesting activity first
Before any mesh is fitted, the array needs a proper inspection. The aim is not simply to confirm that pigeons are present. A competent survey checks the panel edges, mounting rails, cable clips, roof tiles, gutters and the amount of debris below the panels. It should also identify damaged fixings, loose cables, broken tiles and signs that birds have been accessing more than one side of the array.
Timing matters. In the UK, wild birds, their active nests and eggs have legal protection. An occupied nest must not be removed or disturbed without proper consideration of the law. If there are eggs, chicks or clear evidence of an active nest, the work may need to wait until the nest is no longer active. This is one reason a proper assessment is safer than sending somebody onto the roof with wire mesh and a pair of cutters.
The inspection should also establish whether bird proofing is the right first step. If panels are heavily soiled, the roof is contaminated, or gutters are blocked with nesting material, cleaning and clearance may be needed before the perimeter is sealed. Fitting mesh around a dirty, debris-filled array only traps the problem where it is.
How to add bird proofing without damaging the system
Professional bird proofing works by closing the access gap around the outer edge of the solar array. It does not involve drilling into the panels, piercing the roof or packing the space beneath the panels with material. The objective is to deny birds entry while allowing the system to ventilate and drain as designed.
Clear debris carefully and lawfully
Once it is confirmed that no active nest will be disturbed, old nesting material and loose debris should be removed with care. This is unpleasant work as well as a safety issue. Bird droppings can carry harmful bacteria and spores, so suitable protective equipment and safe hygiene procedures are essential.
A professional will avoid pulling blindly around the underside of the panels. DC cables, connectors and roof fixings may be concealed by nesting material. Forcing debris out can damage wiring or dislodge a component that was already under strain. Any obvious electrical concern, damaged insulation or loose cable should be dealt with before the proofing is installed.
Use purpose-made solar panel mesh and clips
The correct material is a durable, weather-resistant mesh designed for solar arrays, fixed with purpose-made clips to the panel frame. The mesh should be strong enough to resist persistent pigeon pressure and corrosion, while the clips should hold it securely without drilling through the frame or compromising the panel.
The mesh is shaped around the full perimeter of the array, including awkward edges near valleys, roof changes and adjoining panels. It needs to sit neatly against the roof line without leaving gaps large enough for pigeons to force their way through. Corners and transitions are where rushed installers often leave weak points, and pigeons are remarkably quick to find them.
A good installation is secure but not over-tightened. Crushing the mesh into the roof surface, bending panel frames or forcing clips into unsuitable positions creates risks that will outlast the pigeon problem. The fitting must also preserve air flow beneath the panels, which helps prevent excessive heat build-up and allows moisture to escape.
Inspect cables, panels and the roof before sign-off
With the perimeter closed, the job is not finished. The installer should check that no cable has been trapped, no panel glass or frame has been damaged and no roof tile has shifted during access. Gutters and roof channels should be cleared where necessary, particularly if birds have been nesting for some time.
If the system has shown a drop in generation, it is sensible to compare output before and after the work and investigate any suspected faults separately. Bird proofing prevents further access. It cannot repair a failed optimiser, damaged connector, inverter fault or pre-existing shading issue.
Choose materials that will last on a British roof
Cheap plastic mesh, ordinary chicken wire and adhesive fixes may look acceptable from ground level, but they are poor choices for a solar installation. Plastic can become brittle in UV exposure. Thin wire can deform or corrode. Adhesives can fail in changing temperatures and may leave residue on panel frames.
A proper solar bird-proofing system should use corrosion-resistant mesh and secure clips suitable for the panel frame. The material must cope with wind, rain, frost and prolonged sun exposure without sagging. It should also look tidy from the ground. Homeowners have invested in solar for lower bills and a better home, not to leave a loose, rusting barrier visible around the roofline.
There is a trade-off worth recognising. Very fine mesh can exclude smaller birds more effectively, but it can be harder to fit cleanly around complex arrays. The right choice depends on the gap below the panels, the local bird activity and the shape of the roof. A one-size-fits-all product is rarely the best answer.
Avoid the shortcuts that create bigger problems
The quickest bird-proofing jobs are often the ones that need correcting later. Never allow anyone to drill through panel frames or roof tiles simply to secure mesh. Panel manufacturers may regard unauthorised drilling as damage, and holes through roof coverings create an obvious water-ingress risk.
Avoid foam, expanding filler and improvised sealants beneath the panels. They restrict ventilation, make later maintenance difficult and can hold moisture and debris in place. Netting stretched loosely over the array is also unsuitable. It can flap in the wind, trap birds and obstruct access for cleaning or repairs.
It is equally unwise to work around live solar equipment without the right competence. Solar PV systems can remain electrically live in daylight even when the inverter is switched off. Safe roof access, electrical awareness and knowledge of panel mounting systems are not optional extras.
When to call a solar specialist
A straightforward, clean array with no signs of damage may appear simple to proof. However, professional help is the sensible route when pigeons have nested for months, debris is deep beneath the panels, access is difficult, the roof is steep, or output has fallen. It is also the right decision if the original installation has poor cable management, damaged tiles or signs of previous substandard work.
A solar specialist understands how to protect the array while working at height and can identify faults that a general pest-control or roofing contractor may miss. At Safer Solar UK, bird proofing is approached as part of the health of the whole solar system, not as a cosmetic add-on.
Keep the system protected after fitting
Bird proofing should be checked as part of routine solar maintenance, especially after severe weather. From the ground, look for lifted mesh, loose corners, new nesting activity and unusual debris around gutters. Do not climb onto the roof to investigate. A loose mesh edge can be repaired early before birds regain access.
Panels should also be monitored through the inverter or generation app. A sudden change in output does not always mean birds are responsible, but early investigation prevents small maintenance issues becoming expensive repairs. A clean, well-secured array is easier to inspect, safer to maintain and better placed to deliver the generation you expected when you invested in solar.
The best time to add bird proofing is before pigeons have fully settled beneath the panels. If they are already there, resist the temptation to seal them in or take shortcuts. Deal with the nesting activity lawfully, protect the roof and fit a system designed to last.